Git is a DevOps tool used by web developers for source code management. It is used to track both big and small projects.
With the Git command, developers can track changes in the source code and use a non-linear development system so that it becomes easier for many developers to collaborate and work on the same project.
In general, Git comes pre-installed on Linux and macOS computers however Microsoft Windows does not offer the Git command by default.
Therefore, for Windows users downloading remains the only option.
If you are looking for a way to download and install Git on Windows then you have come to the right place.
In this guide below, you will learn how to download, install and run the Git command prompt on a Windows computer, in step-by-step instructions.
So let’s get started.
How To Download And Install Git For Windows PC?
Here’s the process you should follow to install Git on Windows.
STEP 1 – Go to Git’s official website and click on the download link above to download Git. After a few seconds, the download will start automatically.
STEP 2 – Upon successful download, go to the download folder and install the Git command on your computer.
STEP 3 – In the next window, Select Components, you will be asked to check some options. You can leave them to default values and proceed further.
STEP 4 – The next step is to choose a default editor. For this, I recommend using Vim, however, if Notepad++ is already installed on your computer then you must use it only. Vim is when your computer has no editor installed.
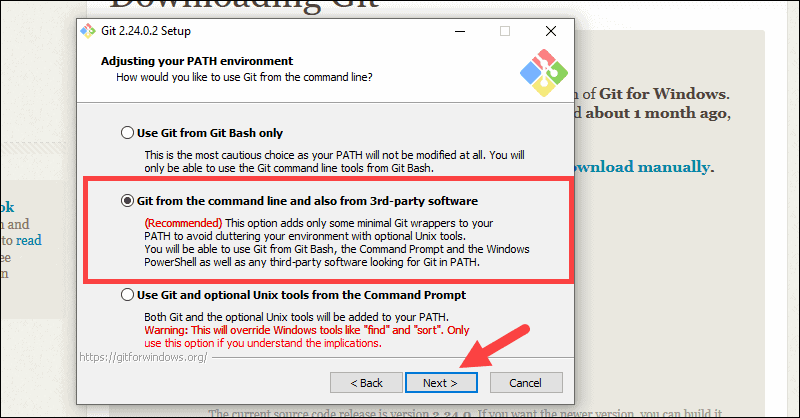
STEP 5 – The next step in the Git setup is Adjusting Your PATH Environment. Of the three options, the best settings are to choose Use Git from the command line and also from the third-party software. With this option enabled, you can use it both ways. From GitBash and Windows Command Prompt.
STEP 6 – In the next window, leave the default option to Use OpenSSH.
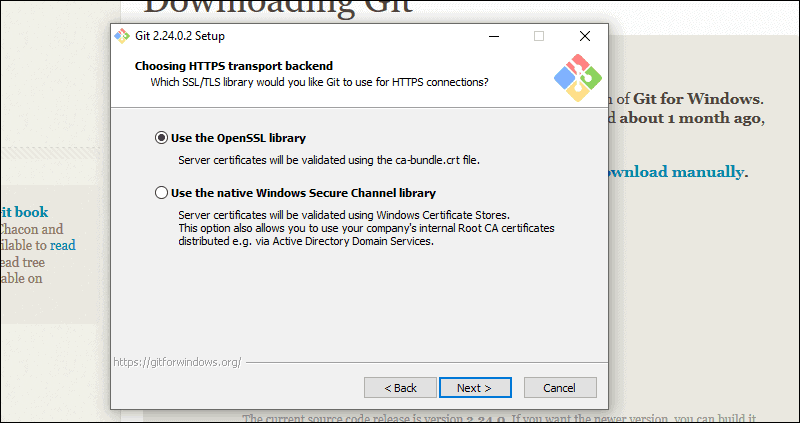
STEP 7 – For Choosing HTTPS transport, continue with the settings Us the OpenSSL library.
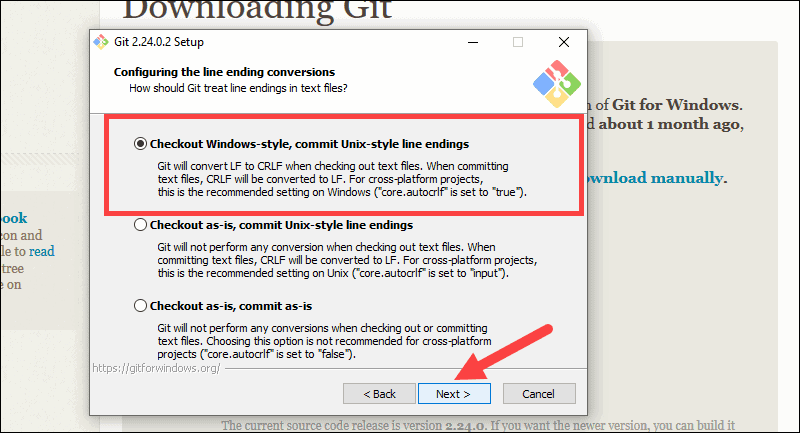
STEP 8 – In the next window, Configuring the line-ending conversions, you have to select Checkout Windows-style, commit Unix-style line endings.
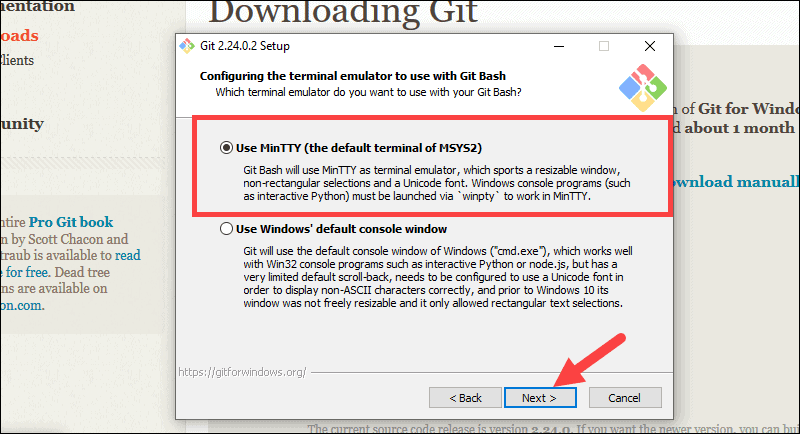
STEP 9 – In the next window, Configuring the terminal emulator to use with Git Bash, click on Use MinTTY (the default terminal of MSYS2).
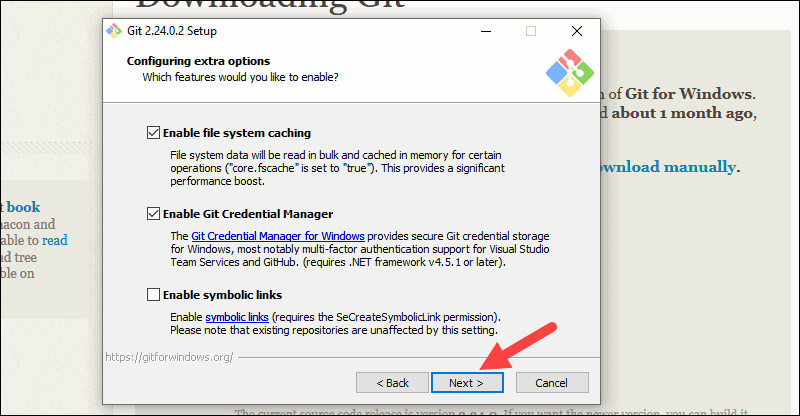
STEP 10 – For Configuring extra options, you can go ahead with the default settings.
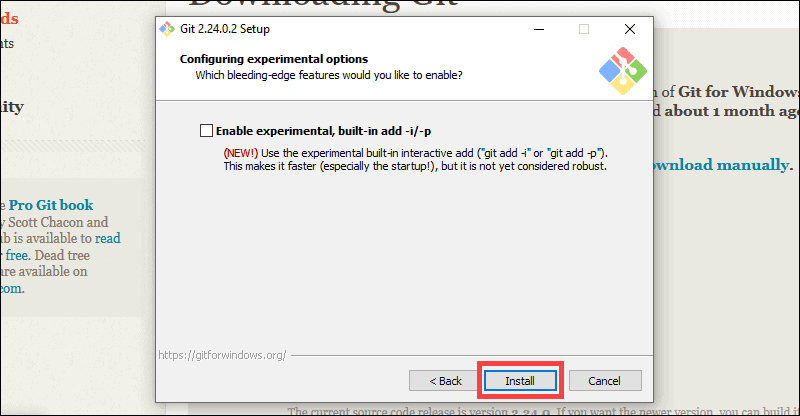
STEP 11 – After all of this, click on the install button and wait for the setup to run.
STEP 12 – Once completed, the next window will ask you two options. You can either check the Launch Git Bash option to run the Bash command tool or click on the Windows command line to use the default option.
How To Launch Git In Windows?
This can be done in two ways.
- To launch Git Bash, open the start menu and type Git Bash, and press enter. Using this method, you will be using the Git Bash option.
- To open GUI, open the start window and type Git GUI, and press enter.
A new window will open asking you to connect a remote repository.
How To Connect To A Remote Repository?
To proceed with this step, you need your GitHub username and password.
CREATING A TEST REPOSITORY
Press Windows key + X and then I open the Windows PowerShell interface. After which the menu appears.
Enter the following value to create a new test directory folder:
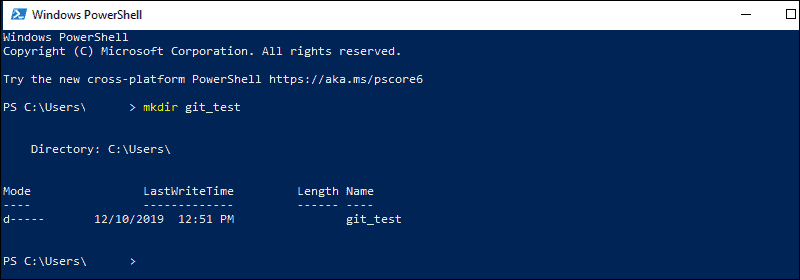
mkdir git_test
Type this entry to change your location to the newly-created directory.
cd git_test
CONFIGURING GITHUB CREDENTIALS
Enter this command to configure your local Git installation to use your GitHub credentials.
git config ––global user.name “github_username”
git config ––global user.email “email_address”
Note – In place of github_username and email_address make sure to use your username and email address.
CLONE WITH A GITHUB REPOSITORY
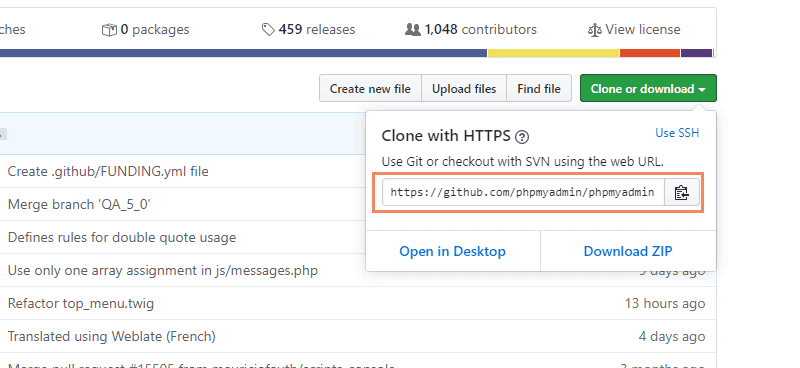
- Navigate to your repository on GitHub.
- In the list of files at the top right corner, open the Clone and download from the drop-down menu.
- Now copy the URL for cloning over HTTPS.
- Enter this command to switch to your PowerShell Window.
git clone repository_url
LIST REMOTE REPOSITORIES
Now you will have a copy of a repository from GitHub. It should be changed to the directory with the name of the project.
cd git_project
Replace the git_project with the actual name of the repository you downloaded.
After you are in the sub-repository, list the remote repositories.
git remote –v
MOVING LOCAL FILES TO THE REMOTE REPOSITORIES
When you have made some changes to your project, you may want to submit them to the remote project on GitHub.
Follow these steps to learn how to do it.
- Enter this value into your PowerShell Window.
new-item text.txt
This will create a new text file.
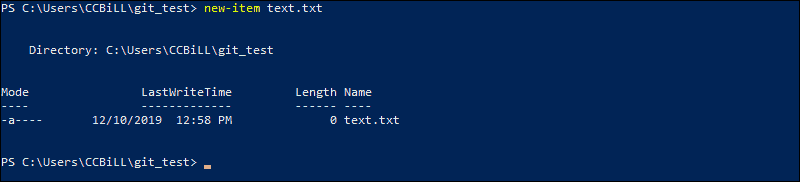
- Confirm that a new file is created.
- To check the status of your new git branch and untracked files enter this command.
git status
- Enter this command to add this to the local project.
git add text.txt
- Run Git status again to make sure that the text files are added.
- The next step is to commit the changes to a local project.
git commit –m “Sample 1”
- To push the changes to the remote GitHub repository enter this command.
git push
The process is complete. I know it was a long one but if you have followed it till here you must have completed the process and installed Git on your computer.
Note – You can remove a remote repository if you no longer need it. It is not that important anymore.
Conclusion
Congratulations, you have completed the download and installation process of Git on Windows. If you have followed the instructions step by step as directed, you must have a working Git software on your Windows computer.
Now you can use the amazing Git command to work on as many projects as you want. As it also allows you to collaborate with other programmers therefore you are free to work with a team and experience the features.
If you found this information helpful please share it on your social profiles. Have any questions? Comment below.